You might have a million questions about concrete polishing. Can you turn concrete into polished concrete? How do I make concrete look polished? Can I polish my existing concrete floor? Don’t worry, we’ve got your back! But before we answer all your concrete polishing questions, let’s take a deeper look at the subject.
What Is Concrete Polishing?
‘Polished concrete’ refers to specific concrete looks and finishes, and the process is similar to sandpapering wood. Concrete grinders and polishers use diamond-embedded abrasives- varying degrees of coarseness to achieve the desired levels of sheen.
You can choose from satin to shiny high-gloss finishes by gradually progressing through finer grit abrasives until you achieve the desired look.
What Are The Benefits of Concrete Polishing?
There’s more to concrete polished floors than meet the eye. Here are some of the top benefits.
1. No Dusting From Efflorescence
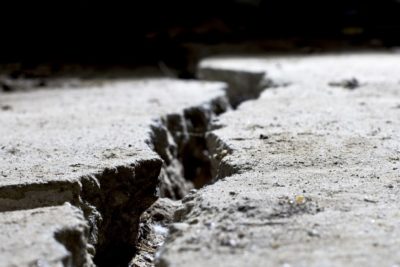
In ordinary unpolished concrete, the dust gets pushed to the surface through hydrostatic pressure, which results in efflorescence. These crystalline deposits of salts can form when water is present in or on concrete surfaces. It has a greyish tint and remains on the surface after the water evaporates.
In addition, efflorescence can appear as a powdery substance on floors and walls, requiring special care to treat. However, polished concrete eliminates the dusting, minimising maintenance costs over unpolished concrete.
2. Stain-Resistance
Concrete polishing seals and densifies a concrete surface, transforming a porous substance into a floor dense enough to keep water, oil and other contaminants from penetrating its surface.
3. Improved Reflectivity
Polished concrete’s reflective properties can maximise lighting in facilities, reduce energy consumption costs and increase safety.
4. Increased Slip Resistance
Although it’s shiny on the surface, polished concrete is not slippery. In fact, there are benefits of mechanically grinding and flattening the floor as it increases friction compared to ordinary concrete.
5. Reduced Maintenance
Most floor systems need some rough scrubbing to maintain their clean appearance. On the other hand, polished concrete surfaces don’t need waxing or stripping treatments to maintain their sheen.
6. Cost-Effective Flooring
With reduced maintenance costs, polished concrete floors are not only stylish but also highly cost-effective.
When Is It a Good Idea to Polish Concrete?
When is the best time to polish concrete? The honest answer isn’t simple because, well, it depends. Since each construction project is unique, there’s no set formula for a concrete polishing time frame.
There are vital differences in polishing for remodelling work and new construction work.
Remodelling Work
A concrete floor can be polished during the demolition process and covered with a protective board or after new walls are built towards the end of construction. The critical factors for concrete polishing during a remodel are the availability of power, lights, water, and other essentials. The total project duration and schedule will also determine when to begin polishing concrete during a remodel.
New Construction Work
New construction projects involve concrete polishing towards the end of the project. Ideally, the outdoor polished concrete flooring should be finished before walls go up. There’s little edge and detail work, and everything seems to go faster and smoother at the end of the project.
What is The Process for Concrete Polishing?
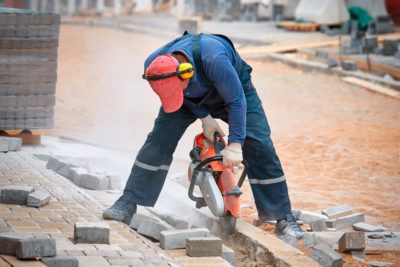
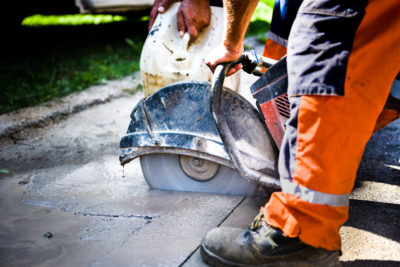
Polishing concrete is often compared to sanding wood. Machines with diamond-segmented abrasives grind down concrete surfaces to the desired degree of sheen and smoothness. And as with sanding wood, you gradually progress from coarser-grit to finer-grit abrasives. The result? A glossy finish!
Dry Concrete Polishing
Dry concrete polishing is the industry’s most common method because it’s fast, convenient and environmentally friendly. With dry polishing, you don’t require water as the polisher is connected to a dust containment system that sucks up all the mess.
Wet Concrete Polishing
Wet concrete polishing uses water to cool the diamond abrasives, eliminating grinding dust. Water reduces friction and works as a lubricant, thereby increasing the life of polishing abrasives. However, the main downside to using this method is the cleanup process, as it creates quite a mess that the construction crews must collect and dispose of in an environmentally friendly manner.
Polishing Pads
A bonded diamond is a disc containing diamond particles embedded in metal. The diamond’s coarseness is known as its ‘grit’. The higher the number, the smoother you can expect the surface finish to be. The process of concrete polishing starts with a relatively coarse, metal-bonded diamond and finishes with a smooth one. For example, you might begin the process with 30 grit and end with 3000.
How to Polish Concrete
Can you polish concrete yourself? How can you do it? Here are some helpful pointers.
Preparing for Polish
To polish concrete, you must wear the following:
- A mask
- Safety goggles
- Ear plugs
- Protective clothing
Initial Steps
- First, the concrete polisher removes any existing surface finishes, for example, any layers of paint. This will usually be done using a 16-30 grit resin-bonded diamond.
- When you operate the machine, ensure you walk in smooth, gently overlapping lines. Once a run in one direction is done, angle the device 90 degrees and start again to ensure the entire surface has been covered.
- If you spot any holes or chips in the concrete, you must clean and then fill them with a patching compound. Then, when this is dry, smooth off the excess filler material with the same 16-30 grit pad.
- You can now move on to an 80-grit diamond. You could vacuum away any dust and then apply a sealant.
The Polishing Process
- If you desire a highly-reflective, polished finish, you can continue the process using several increasingly smoother diamonds.
- To finish, you use a 1500 to 3000 grit pad, depending on how reflective you want the surface to be. You can also use non-diamond burnishing pads to add a final sheen to your burnished concrete floor.
Final Steps
- Once you’ve finished polishing, vacuum away all the dust and wipe down the surface with a dry cloth.
- Next, apply a coat of sealer, essential to achieving a mirror finish.
- Give the sealer at least 45 minutes to dry, then add a sealant to make the surface watertight. You should now have a durable, beautifully reflective concrete floor.
Who can help you with the process?
If you want to take an ordinary DIY concrete slab or concrete floor from drab to a fabulous polished concrete floor, Diamond Cut Concrete can help. Whether you want polished floors or a polished concrete driveway, we’ve got you sorted.
Contact us today for all your polished concrete flooring needs!