How does the saying go? “ice cream melts and concrete cracks”.
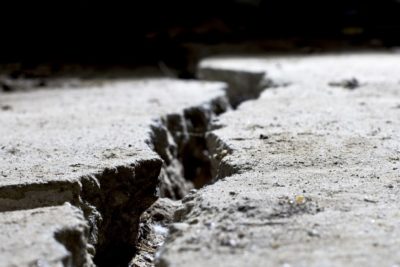
A common problem faced by most concrete contractors is the uncontrolled and random cracking of concrete.
This unsightly phenomenon occurs due to a number of reasons including rate of drying, drying shrinkage, tensile strain and strength, as well as temperature, humidity and moisture.
In this article, we’ll run through how you can prevent and control random cracks.
As the concrete starts to hydrate and sets internal stresses develop and create an ideal situation for random cracking of concrete to occur.
For example, cracks which happen during the drying process can be referred to as ‘shrinkage cracks’.
These cracks are influenced by a number of factors, including water/cement ratio, humidity and temperature, composition of cement, surface texture and more.
Other types of cracks in concrete to consider include:
- Expansion cracks
- Settlement cracks
- Plastic shrinkage cracks
- Heaving concrete cracks
So the question is…
How do you control or eliminate uncontrolled concrete cracking?
The main objective in controlling random cracking of concrete is to relieve the internal stresses which occur during the first 72 hours of concrete drying before they seek their own relief in the form of random cracks.
When it comes to crack prevention you have two main methods:
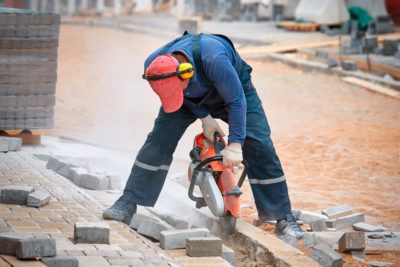
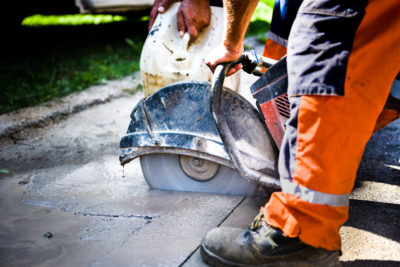
Method #1 — Wet sawing control joints
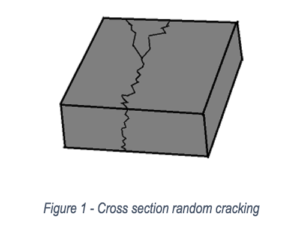
One method of trying to control cracking of concrete is to wet saw the hardened concrete to create a weakened area to encourage cracking to occur at a controlled location. (See Figure 1 – Cross section random cracking)
It’s important to note that timing is everything. The longer sawing is delayed the higher the potential for cracks to establish themselves. Environmental factors which affect shrinkage such as temperature and humidity are at its peak in the first 72 hours of placement of concrete.
By the time you are able to get a heavy floor saw in and place joints into the hardened concrete, the cracks have already begun to show.
Issues with Wet sawing control joints in the placed concrete are:
- Heavy floor saws will get access too late to prevent the random cracking.
- Standard floor sawing a green concrete will cause chipping or spalling as the aggregate in the concrete is dragged to the surface and dislodged from the concrete.
Method #2 — Early entry concrete cutting
As mentioned above in method 1, timing is everything, and in 1988 early entry concrete saws were introduced into the American market.
Early entry concrete cutting involved making cuts — construction/control joints — to concrete slab at predetermined locations in the early stages of being placed to control random cracking.
This allowed for ‘controlled’ cracks to take place beneath the concrete surface and achieve an aesthetically pleasing finish on the surface.
With emphasis on ‘early entry’ and timing, early entry concrete cutting equipment offered concreters a wealth of advantages in comparison to previous methods.
6 Advantages of Early Entry Concrete Cutting
1. Early entry saws are lighter than conventional road or floor saws
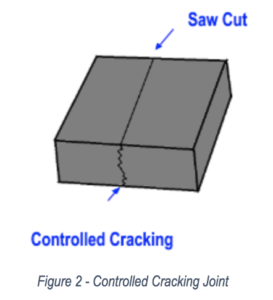
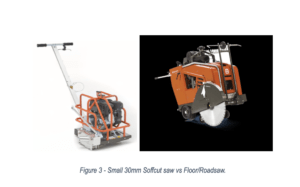
It allows access for cutting the concrete earlier. Furthermore, it suggested that the shallower saw cut will use the changes in moisture and temperature at the surface of the concrete to initiate cracking below the saw cut. (Tyson S, 2007) (See Figure 2 – Controlled Cracking Joint and Figure 3 – Small 30mm Soffcut saw vs Floor/Roadsaw.)
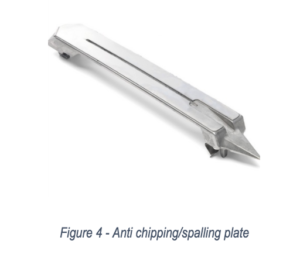
2. Early entry saws have a skid plate that straddles the blade
This places downward pressure on the surface of the concrete to prevent chipping or spalling. (Tyson S, 2007). (See Figure 4 – Anti-chipping/spalling plate)
3. Early entry saw cutting is a dry cut operation and does not need a separate water supply to cool the blades
This means there are no slurry stains left behind and slurry collection costs are avoided.
4. Early entry saws rotate the blade in an upwards direction to keep debris out of joints
5. Early entry joints minimise unplanned cracking and joints are shallower allowing for greater interlocking of the concrete. (Pevreall B, 2012)
6. Early entry concrete cutting is fast
This method allows the job to be completed the same day as pouring.
When is the best time to cut?
The timing will vary due to how the concrete was mixed as well as current weather conditions. Cuts can be made anywhere from within the first 1 to 2 hours after placement and up to 12 hours later.
Warmer weather and depending on if accelerants will allow, cutting can start within 2 to 4 hours of final finishing. During the winter months with cooler conditions, cutting can start up to 12 hours later. (Tyson S, 2007) (Pevreall B, 2012) Under normal conditions, the concrete should be cut within 8 hours of casting.
Knowing when is the right time to cut will require judgement of an experienced concrete cutter. If cutting begins too early, spalling and chipping will occur.
Cutting too late will result in a greater chance of random cracking. (Illustrated in Figure 5 – Joint sawing window)

Diamond Cut Concrete has over 10 years of experience in Early Entry Concrete Cutting and is capable of assisting with any concerns you may have.
What are the recommended cutting depths?
Cutting should be no greater than the depth to which the concrete has dried. When cutting the concrete, make sure the dust should be slightly damp.
Damp dust suggests that the depth of the cut is greater than the depth of drying. If the dust is very damp the cuts may be too deep or cutting has started too early.
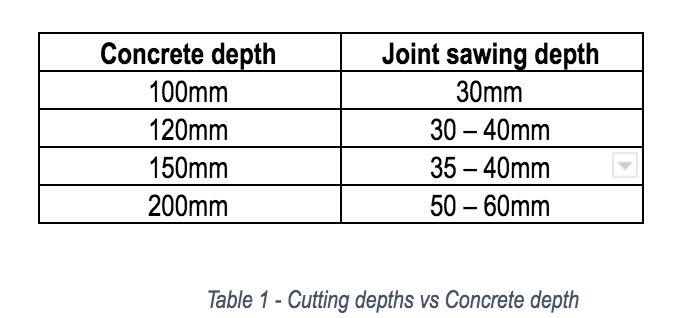
The recommended cutting depth should always be 25% to 30% of the total depth of the concrete that has been laid. Refer to the table below for cutting depths. (Table 1 – Cutting depths vs Concrete depth) (Pevreall B, 2012)
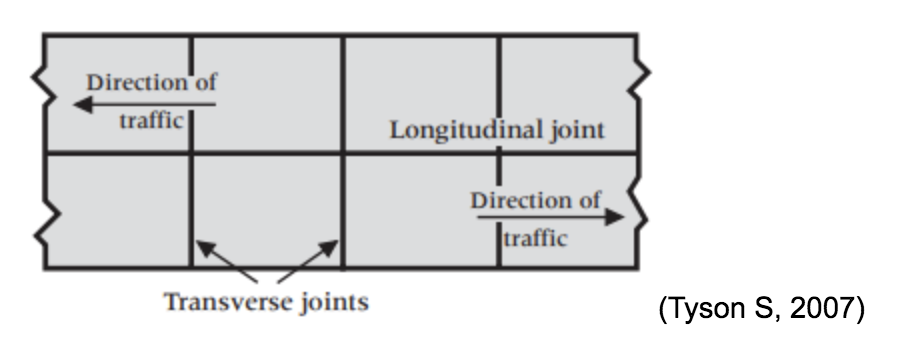
Where are joints placed?
Concrete cracks naturally to an approximate 4 metre grid. Most commercial or industrial concrete pavements or slabs are cut to 4-metre grids. (Pevreall B, 2012)
Large engineering projects such as airport taxiways with slabs 400mm+ thick can cut 5.5 metre grid pattern whereas concrete driveways 350mm+ thick can have a 4.2 metre grid plan.
Key takeaways
Early entry saws are lightweight and capable of being placed on fresh concrete slabs and pavement within 1 to 4 hours after being finished. With the correct timing and depth, a shallower cut can be placed into the surface of the concrete as compared to other systems.
This process has been shown to weaken the concrete in areas where they have been cut to establish a weakening and control random cracking along the joints.
Specific advantages of Early Entry Joint Sawing —
- Dry cutting without the need of water means no slurry is left behind, keeping the worksite clean & tidy, as well as removing slurry collection costs.
- Upwards cutting to keep debris from joints for a cleaner surface finish.
- Skid plates used to minimise chipping and spalling of drying concrete.
It is recommended that clients use an experienced concrete cutter to carry out these works to avoid any issues of random cracking or chipped slabs and pavement.
With the use of early entry joint cutting, projects undertaken by Diamond Cut Concrete have seen improved productivity, effectively reducing costs and less manpower needed. We continually invest in the latest concrete cutting equipment and safety training, and are committed to delivering a high quality finish on time.
Contact Diamond Cut Concrete today for a cutting-edge solution suited to your project needs and budget.
References
- Tarr S & Criag P, 2008, Early-Entry Joint Sawcutting Provides Long-Term Benefits, Concrete Construction, 13/02/2020, https://www.concreteconstruction.net/how-to/construction/early-entry-joint-sawcutting-provides-long-term-benefits_o
- Pevreall B, 2012, Soff-Cut Early Entry Sawing, Husqvarna Australia,13/02/2020, http://www.concretepavements.com.au/Documents/SoffCut%20Early%20Entry%20Sawing.pdf
- Tyson S, 2007, Early-Entry Sawing of Portland Cement Concrete Pavements, Concrete Pavement Technology Program, 13/02/2020, https://www.fhwa.dot.gov/pavement/concrete/pubs/07031/07031.pdf
- Rodriguez, 2018, When, Where, and How to Make Saw Cuts in Concrete, The balance small business, 13/02/2020, https://www.thebalancesmb.com/saw-cuts-in-concrete-how-frequent-and-how-deep-844457