An innovation of one of the most used materials in construction, tilt-up construction and precast concrete construction is now widely adopted for its versatility, speed of construction and lower cost benefits.
Although there are many similarities between the two, they are in fact, 2 very different construction methods.
In this post, we discuss the construction process, the differences between tilt-up panel construction and precast concrete, and their common commercial and industrial applications.
However, before entering the world of tilt up panels and precast concrete structures, let’s get the foundation down first.
What is tilt-up construction?
Tilt-up construction involves manufacturing large concrete panels which are then lifted/tilted into place by a crane. Tilt up panel construction has become an extremely popular method of construction for commercial and industrial developments for its ability to deliver rapid project completion.
Versatile in design, tilt up concrete walls require fewer joints, is highly durable and is more dense than brick, making it one of the most cost-effective methods of construction.
Where the confusion usually arises is where the concrete slab is poured and manufactured. Let’s take a look at how tilt-up construction works.
Tilt-up construction process
- The first step in the process of tilt-up construction is the slab preparation, which can happen in one of two ways:
Poured — tilt-up panels are manufactured in an open floor on-site casting slab, which minimises transportation costs.
Precast — precast concrete panels are manufactured off-site, which are then transported to site by truck.
This is where the argument of precast vs poured concrete comes into picture and is one of the key differences between tilt up walls and precast walls. - Tilt up concrete panels process begins with laying out the floor slab and constructing the formwork. Formwork helps with curing and strengthening the concrete and is best used for thicker slabs of concrete where the risk of cracks in concrete surfaces is higher.Need urgent concrete crack repairs? Contact Diamond Cut Concrete today.
- Next, release agents are applied, reinforcements are placed, structural steel and lifting and bracing hardware is attached.
- Concrete is then poured in the forms, finished and cured. Depending on the weather, pouring of concrete can be delayed. Curing concrete in bad weather can increase the risk of surface cracks.
- The concrete curing process can take up to a week to 10 days as it is allowed to dry and strengthen. Once the cast is cured, concrete elements are cut to size. The formwork is either removed or reused for another section of the same project.Things that can go wrong in this stage include blown out formwork, which results in uneven tilt up wall panels. This will require the work of a professional concrete cutter to cut the edges and make sure they align with other wall panels.
- The panels are then lifted or tilted into place from their manufactured position by a mobile crane. Before the panels are released, temporary braces are installed to provide additional support until the roof is attached.
- Final process involves connections made between panels, this includes connecting floor slab to walls using concrete, joints caulked, blemishes are repaired if required, roof is connected and bracing is removed.
Common applications of tilt-up construction
- Factory developments
- Warehouses
- Renovating old warehouses and transforming them into shopping centres
- Large industrial projects
- Offices
- Showrooms
- Shopping centres
- Medical centres
- Schools
Key benefits of tilt-up construction
One of the main benefits of tilt-up wall panels is that they are load-bearing. This means they do not need perimeter columns or roof beams, typically needed with precast concrete projects. This allows for greater flexibility for exterior openings and design changes, such as cutting windows to improve lighting or wall sawing a doorway for an industrial roller door.
Other benefits include:
- Design flexibility — tilt panels can be cast in a wide variety of shapes and sizes
- Deliver a more uniform finish — more on-site quality control during casting process
- Speed — poured and cured on site, there is no need for transportation and can be tilted into place
- Reduced construction costs— fewer panels to erect, less labour required, premix concrete is much cheaper, quicker and easier to source
- Reduces energy operating costs — superior thermal performance that conserves energy
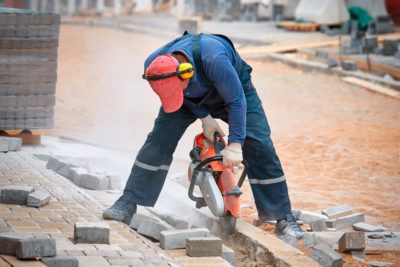
Tips to cut tilt-up concrete panels
Cutting tilt-up concrete can be tricky to get right. You need the right tools and techniques to make sure you’re getting the best quality cuts that you can. Some basic tips include:
- Work with a high standard of safety
- Use the right tools for each cut, and make sure to cut slowly
- Manage the dust on your worksite. Dust is a huge health risk, so take steps to control it.
- Know what’s underneath the concrete you’re cutting. You don’t want to cut into plumbing, gas, or electrical components. Check blueprints or use concrete imaging technology to check your concrete before you cut.
If you need your tilt-up concrete panels cut, be sure to get in contact with the concrete cutting experts at Diamond Cut in Perth, Western Australia. From commercial tilt-up construction to industrial warehouses the Perth experts at Diamond Cut can help with all concrete cutting, drilling, and scanning needs.
- Industrial roller doors – windows
- Builders renovating an old warehouse to transform into a shopping centre
- Insert windows to improve lightning
- 150mm deep concrete – cutting
- Mark and outline the cutout and how it gonna be dropped out
- Wall sawing
- Industrial areas
- Price is per cutout – linear meters by time – disposal of the concrete
Tilt-up Construction Cost
Our production and erection cost of tilt-up panel construction ranges from $90 per m2 to $120 per m2 fully installed but can be more expensive, depending on the thickness, size, shape and application.
- These costs also don’t take into account support arrangements in terms of footings and roof steel and any surface treatments such as painting or cast in detail (panel grooves etc) and assume that panels don’t need casting beds and can be cast on the floor slab and propped back to the floor slab once erected.
- These costs also don’t take into account the builders’ costs of supervision, insurances, warrantee, overheads and margin so they are unlikely to be the finished cost of tilt panels per m2 on your project.
- For further specific costing relative to your project please reach out to us via our contact us form or by calling our office.
Where insufficient floor space is provided for casting, where a particularly high quality (post-construction) ground floor slab is required, where delay pour slab is required to be eliminated, the provision of temporary casting beds and their removal and disposal can add significantly to the cost of the tilt panels on a project.