Curing concrete is the most important step when pouring concrete for a slab, pavement, road or tunnel. Getting it right is extremely important as any mistakes, big or small, will cost you a lot of money, time and effort, especially when these mistakes can easily be prevented.
Curing concrete is the long and crucial hydration process of preventing water evaporating and warmth from escaping from your concrete slab during its drying (strengthening) period.
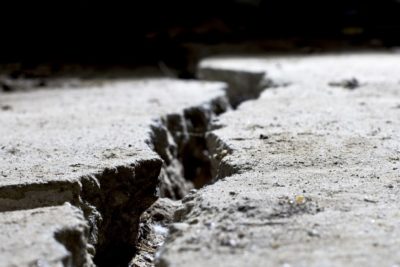
When concrete curing is done properly your concrete slabs will be more durable, strong, resistant to freezing or thawing and abrasion, which will prevent thermal cracks, the development of plastic shrinkage cracks and a worrying amount of loss in strength in the surface layer.
Different Concrete Curing Methods
There are a variety of different ways concrete curing can be performed depending on your site and construction method. The thickness of your concrete slab may also determine which concrete curing method is best. This can be achieved with concrete testing.
There are many different curing method options available such as:
- Water Curing
- Wet Covering
- Formwork Curing
- Membrane Curing
- Sheet Curing
- Curing by Absorbing Heat
- Hot mixing method
- Electrical curing
- Infra-Red Curing
- Cover with Sand or Sawdust, Soil, etc
- Natural Curing (Exposed concrete)
Concrete Curing: Do’s
Understand that different concrete structures require different curing methods
In commercial driveways, a concrete slab will need to be able to support the constant heavyweight from traffic, trailers and delivery trucks. So the concrete slab will need to be thicker than a residential driveway that only has one family-sized car parking on it.
Generally, residential driveways are 6 inches compared to commercial driveways that are 8-10 inches. Lighter traffic areas like pavements only need to support the wheels of bikes instead of cars, so the thickness can be as thin as 4 inches.
For thinner slabs such as a floor slab for a new home, water curing (moist curing) is a recommended method, whereas formwork curing is best used for thick concrete where the risk of cracks in concrete surfaces is higher.
DO spray new concrete with water.
Moist curing is a common method of concrete curing. It involves wetting the concrete slab often with water (5-7 times per day) for the first 7 days. This method ensures your concrete slab will be extremely strong and durable, because it allows the moisture to evaporate slowly, preventing cracks and shrinks.
This method is not recommended when the temperature is colder.
DO cover new concrete.
If you are busy with other projects and don’t have time to frequently hose down your concrete slab as suggested above, we recommended you cover your slab with plastic sheeting to prevent moisture from evaporating too quickly.
Your local DIY store will supply suitable coverings such as:
- Polyethylene sheeting (at least 4mm thick)
- Concrete curing insulating blanket
Apply covering only after you have wet your concrete thoroughly. Use heavy items such as bricks or rocks to hold the cover in place. Adding moisture is still really important, so make sure you are removing the cover every day to hose down the concrete slab. You will need to do this every day for 7 days.
This method is really common when concrete curing floor slabs for new homes, but also upright concrete columns and walls.
DO wait 1 month until painting or staining
Painting or staining your concrete too early will create a negative chemical reaction that will affect the appearance of your concrete slab. Even during the 28 days following concrete curing moisture is still rising to the top. Adding a layer of paint or stain on top of the rising moisture will create pressure beneath it that will cause the paint to peel.
Concrete Curing: Dont’s
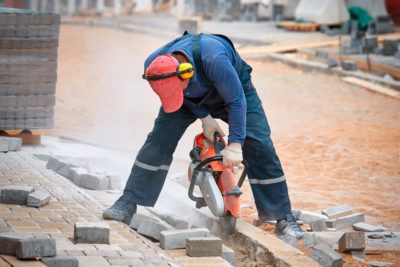
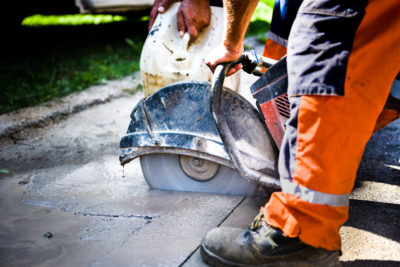
Do Not Begin Without The Proper Tools
As there is a narrow window after you have poured your concrete in which to begin the curing period, you want to make sure you put in the preparation before you began.
Double-checking you are prepared with every necessary tool required, and that you and every team member know how to confidently use every tool, will save you time, money and effort, and prevent your concrete installation from turning horrible.
Common tools include:
- Industrial-grade wheelbarrows
- Trowels designed for concrete
- Hand Floats and Darby
- Bull float and/or hand float
- A concrete rake and broom
- Protective boots, gloves and other gear.
Do Not Rush To Pour Concrete Without The Proper Site Inspection
Being patient and ensuring your site is prepared correctly will help you achieve an easy professional result.
Preparing your site for concrete involves:
- Clearing land to remove any roots that may interfere with your concrete installation in the future and soft topsoil
- Levelling the site
- Ensure proper drainage is created around the concrete to prevent the concrete from shifting and cracking in the future
Do Not Work Alone
The most important tip to remember when curing concrete is to never work alone. The entire process of pouring concrete is time-sensitive and not doing it properly, from start to finish, will result in wasted time and money.
So the more help, the better. Whether it’s using an experienced team on a commercial construction site, or all your mates to help you with your driveway or shed slab.
You only have one chance to properly finish your concrete and not having enough people to help you complete it efficiently will result in brittle, lumpy, unlevel concrete that will also be prone to weather damage. all your hard work will be wasted. you
Do Not Pour Concrete In Bad Weather
Avoid beginning your concrete project when the weather is less than ideal. Heavy rain can affect your hard work by washing out some of the cement from the mix. Which means the strength of the concrete will be affected.
It’s important to note that curing concrete in cold weather poses the risk of your concrete’s surface drying out too fast.
The entire concrete curing period takes around 1 month to complete. The time you should begin curing your concrete and which method you should use will depend on your specific situation.
Speaking to a professional will ensure you are fully prepared for your DIY project. As curing concrete is a time-sensitive job requiring accuracy and precision we do recommend hiring a professional for the best results.
Diamond Cut Concrete have trusted professionals with years of experience delivering high-quality and efficient concrete curing. Send Diamond Cut Concrete an enquiry form here.